Dr. Nicole Alexander-Scott, head of the RI Department of Health, today recommended that everyone wear cloth masks when in public. But it isn’t easy to find one. No problem! Keep it calm and sew on! If you’re missing some materials necessary that’s okay. Time to get resourceful. If you don’t have any fabric, use an old tightly woven shirt. If you don’t have elastic straps, use old bra or bathing suit with elastic ties.
Materials:
- (2) Pieces of elastic (7″ each)
- 1 piece of fabric with a high thread count
- Access to a sewing machine
Lets Get Started:
- Cut a piece of fabric to 15 inches wide by 8 inches high.

- Place the panel you have with the right side facing up. (The side you want the world to see.)
- Fold the corners from left to right and match the edges.
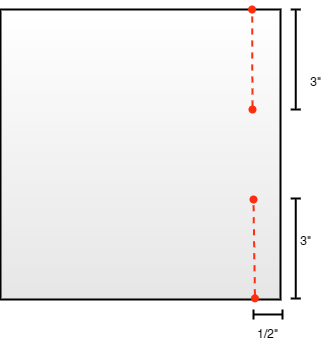
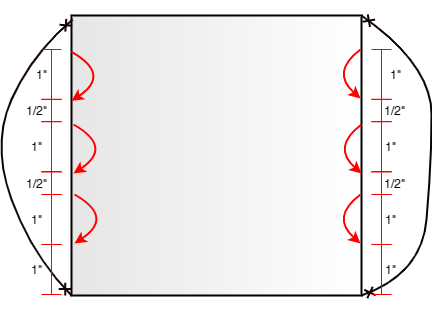
- Once your edges are even, sew along the red dashed line allowing a 1/2″ seam allowance along the top 3″ of your fabric. Do not sew the entire length; this gap allows you to insert a filter if you’d like (a strip cut from a reusable shopping bag is a good choice). This will also be important for flipping your mask inside out in a later step.
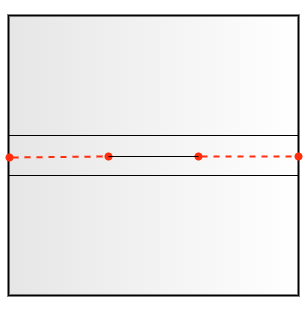
- Bring your newly sewn edges to the center of your fabric.
- Rotate your fabric clockwise 90 degrees.
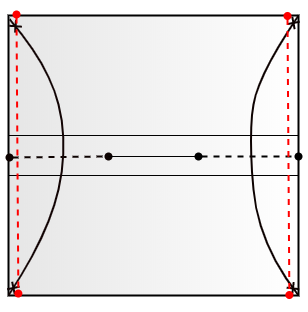
- Prepare both your your elastic straps by pinning them between the two layers of fabric. Pin the first elastic to the top left of corner to the bottom left corner and the second piece of elastic from the top right corner to the bottom right.
- Make sure that your elastic straps are tucked in between the layers of fabric and pinned securely. Sew along the red lines on the left and right of your mask securing the elastic straps.
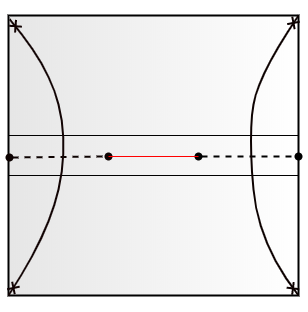
- Once your garment is fully stitched flip the mask inside out through the slit left in step 4 indicated in red below. Press your mask with an iron to get the ideal shape.
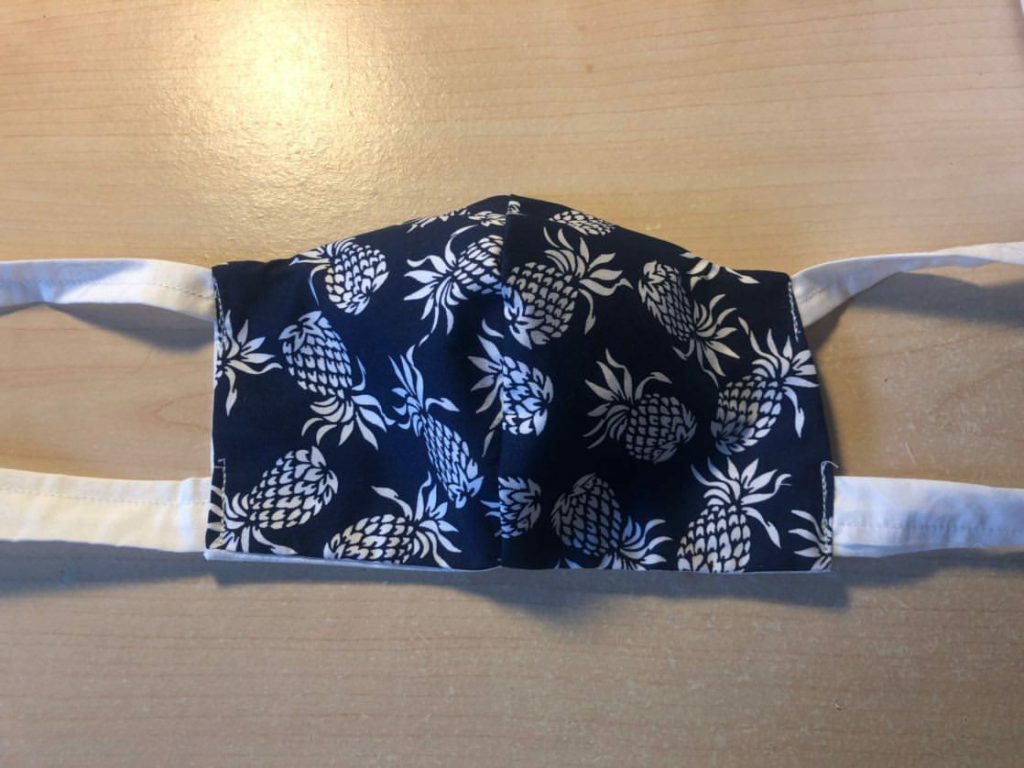
- Congrats! you almost have a mask. Here come the last few steps. Fold the fabric down symmetrically to create your pleats. Once you’re satisfied with the way they look, pin them in place. You should wind up with a total of three pleats.
- Last step. Sew along both the left and right edges noted by the red dashed lines in the diagram below. Do this as close as comfortable to the edge to set the pleats in place.
If this tutorial has helped you and you have created a mask you’re proud of, please feel free to send us a picture of your mask at maskedbymotif@motifri.com.